Intro
In previous article, I've explained how to create a geolocation field customizer using SPFx.
Today, let's focus on the deployment process.
I will quicky create a new SPFx project with geolocation field customizer using the following command:
yo @microsoft/sharepoint --component-type "extension" --extension-type "FieldCustomizer" --component-name "Geolocation" --framework "none" --environment "spo" --package-manager "npm" --solution-name "location-field-customizer" --skip-feature-deployment
Open the generated project folder in Visual Studio Code and edit the src/extensions/geolocation/GeolocationFieldCustomizer.ts.
Define new interface IGeolocationFieldValue to represent the geolocation field value:
interface IGeolocationFieldValue {
  DisplayName: string;
  Address: {
    Street: string;
    City: string;
    State: string;
    PostalCode: string;
    CountryOrRegion: string;
  };
  Coordinates: {
    Latitude: number;
    Longitude: number;
  };
  UniqueId?: string;
}
Update the onRenderCell method to render the geolocation data:
public onRenderCell(event: IFieldCustomizerCellEventParameters): void {
  if (event.fieldValue !== undefined) {
    event.domElement.classList.add(styles.geolocation);

    event.domElement.innerHTML = this.renderMinimalDisplay(event.fieldValue);
  } else {
    event.domElement.innerText = 'No location specified';
  }
}

private renderMinimalDisplay(fieldValue: IGeolocationFieldValue): string {
  return `
    <div class='${styles.geolocation}'>
      <strong>${fieldValue.DisplayName}</strong><br>
      ${fieldValue.Address.City}, ${fieldValue.Address.CountryOrRegion}
    </div>`;
}
After implementing the geolocation field customizer, it's time to deploy it, but before deployment itself, we need to modify two files:
package-solution.json- update metadata about the extension like name, description, version, etc.elements.xml- register the field customizer to the specific field
Update package-solution.json
The package-solution.json file is located in the config folder. Update the metadata section to reflect your extension's details:
{
  "$schema": "https://developer.microsoft.com/json-schemas/spfx-build/package-solution.schema.json",
  "solution": {
    "name": "Geolocation Field Customizer",
    "id": "c55b45bf-9fa9-4c08-a8b8-bbc2adcd4ea7",
    "version": "1.0.0.0",
    "includeClientSideAssets": true,
    "skipFeatureDeployment": false,
    "isDomainIsolated": false,
    "developer": {
      "name": "Martin Machacek",
      "websiteUrl": "https://martin-machacek.com",
      "privacyUrl": "",
      "termsOfUseUrl": "",
      "mpnId": "Undefined-1.21.1"
    },
    "metadata": {
      "shortDescription": {
        "default": "Geolocation Field Customizer"
      },
      "longDescription": {
        "default": "Renders details like address, city and country for Geolocation field"
      },
      "screenshotPaths": [],
      "videoUrl": "",
      "categories": []
    },
    "features": [
      {
        "title": "Application Extension - Deployment of custom action",
        "description": "Deploys a custom action with ClientSideComponentId association",
        "id": "73f651ba-05d1-4e20-ba8d-c443f71ef378",
        "version": "1.0.0.0",
        "assets": {
          "elementManifests": [
            "elements.xml"
          ]
        }
      }
    ]
  },
  "paths": {
    "zippedPackage": "solution/location-field-customizer.sppkg"
  }
}
Update elements.xml
By default, the elements.xml file is located in the sharepoint folder and looks like this:
<?xml version="1.0" encoding="utf-8"?>
<Elements xmlns="http://schemas.microsoft.com/sharepoint/">
    <Field ID="{3eda5477-4d35-454b-9fe4-e09f907a946d}"
            Name="SPFxPercentage"
            DisplayName="Percentage"
            Type="Number"
            Min="0"
            Required="FALSE"
            Group="SPFx Columns"
            ClientSideComponentId="cc0e2515-079a-4c40-8690-4934facc48d6">
    </Field>
</Elements>
The extension will be invoked only if the SharePoint list field's name matches the DisplayName attribute in the XML. I will use name like LocationDetails. Change also the Name attribute to something like SPFxLocationDetails to reflect new display name.
For the geolocation field, we need to change the Type to Location. Double check that the Type attribute is set to Location, otherwise, the field customizer will not work correctly.
<?xml version="1.0" encoding="utf-8"?>
<Elements xmlns="http://schemas.microsoft.com/sharepoint/">
    <Field ID="{3eda5477-4d35-454b-9fe4-e09f907a946d}"
            Name="SPFxLocationDetails"
            DisplayName="LocationDetails"
            Type="Location"
            Required="FALSE"
            Group="My Custom Columns"
            ClientSideComponentId="cc0e2515-079a-4c40-8690-4934facc48d6">
    </Field>
</Elements>
Deploy the solution
Now, open the terminal and run the following commands to bundle and package the solution for deployment:
gulp bundle --ship
gulp package-solution --ship
If the command fails with the warning like
Warning - [package-solution] GeolocationFieldCustomizer: Admins can make this solution available to all sites in the organization, but field customizers won't automatically appear. SharePoint Framework field customizers must be specifically associated to fields programmatically to be visible to site users.
Then open gulpfile.js and add a new suppression for a warning:
build.addSuppression(`Warning - [package-solution] GeolocationFieldCustomizer: Admins can make this solution available to all sites in the organization, but field customizers won't automatically appear. SharePoint Framework field customizers must be specifically associated to fields programmatically to be visible to site users.`);
By default, the generated .sppkg file will be located in the sharepoint/solution folder.
Upload the package to the App Catalog
In next step, we need to the package that was generated to tenant's app catalog
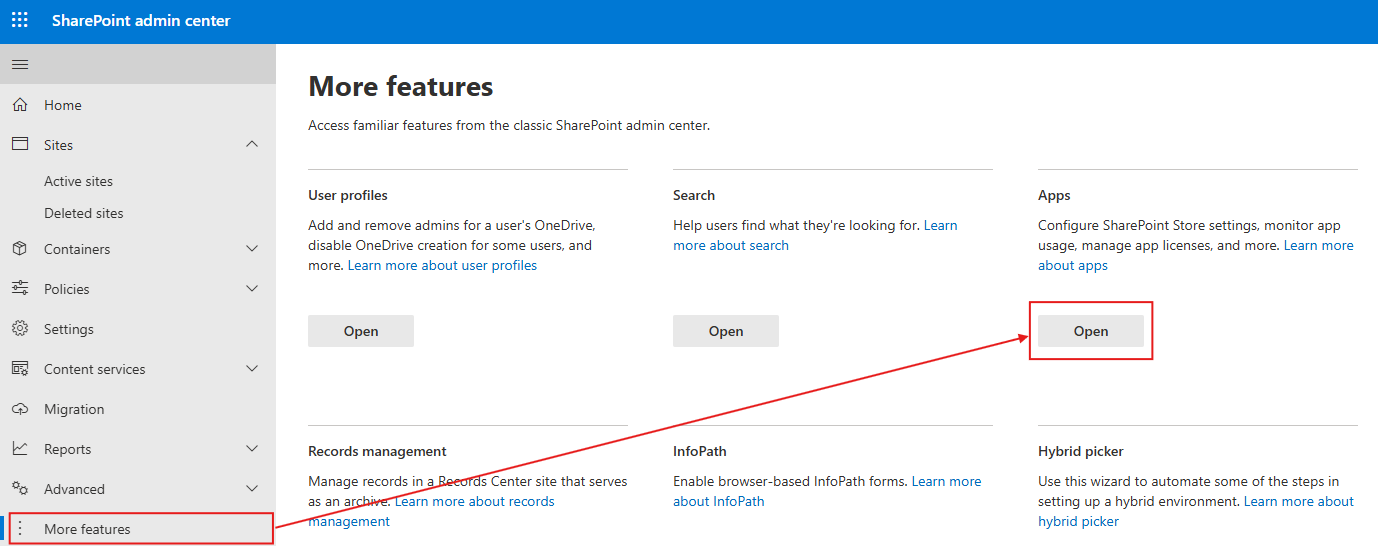
Go to the SharePoint Admin Center → More features → Apps → Open
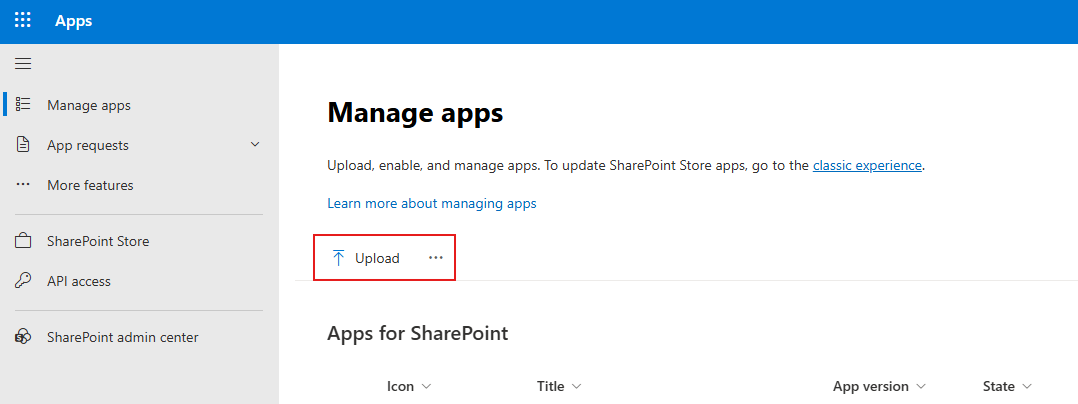
Upload the .sppkg file to the Apps for SharePoint library.
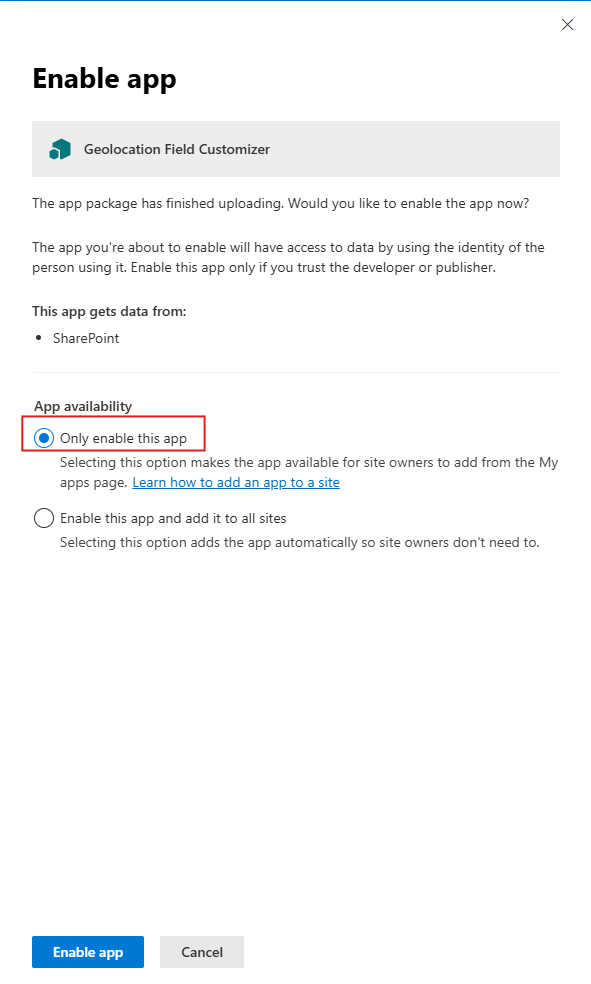
Only enable the app.
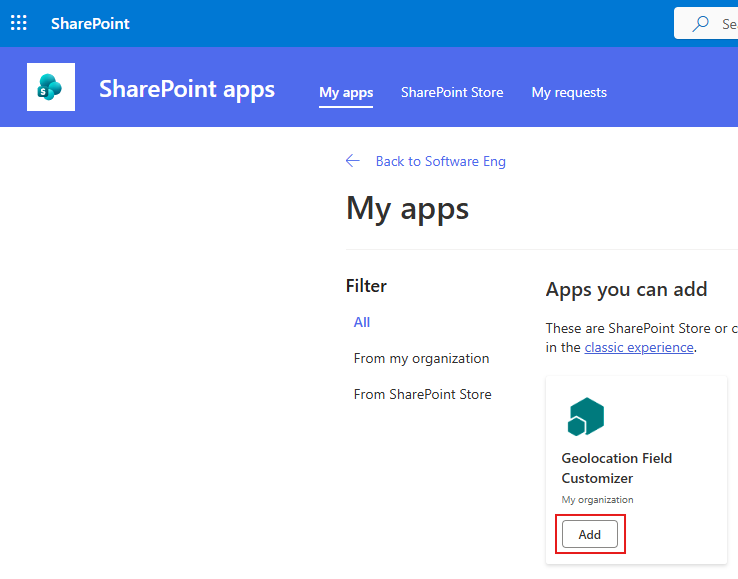
Go to the site where you want to use the geolocation field customizer to add the app to the site. Select the gears icon on the top right, and then select Add an app.

Select the app you just uploaded to the app catalog and click on the Add button.
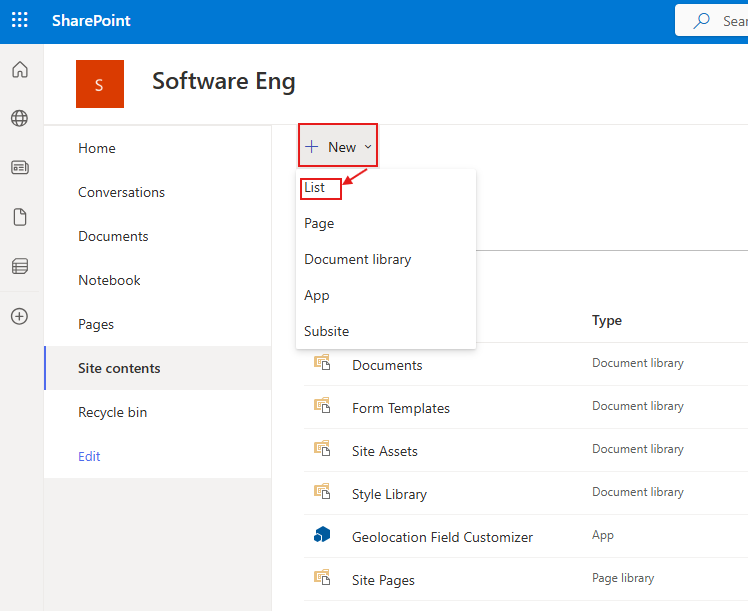
Go to the Site contents page

You should see the app listed there.
Create a new list.
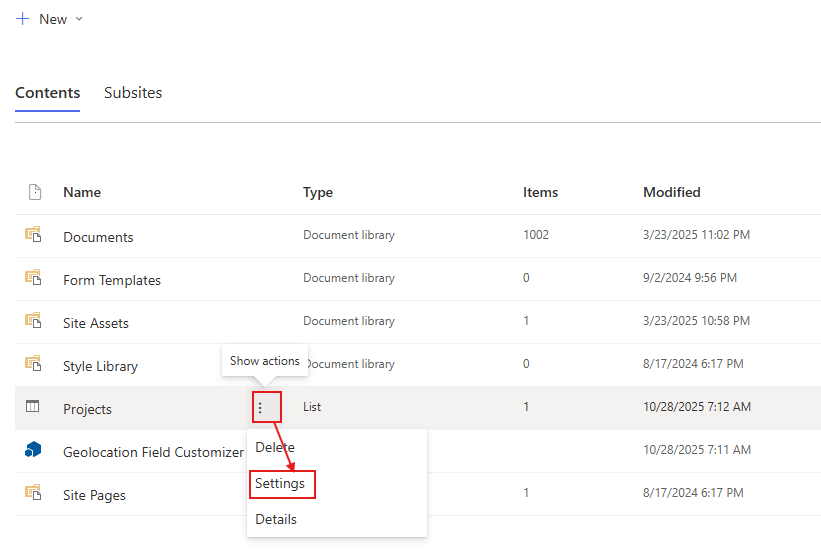
When the list is created, on the Site contents page, select Settings from the menu of the created list
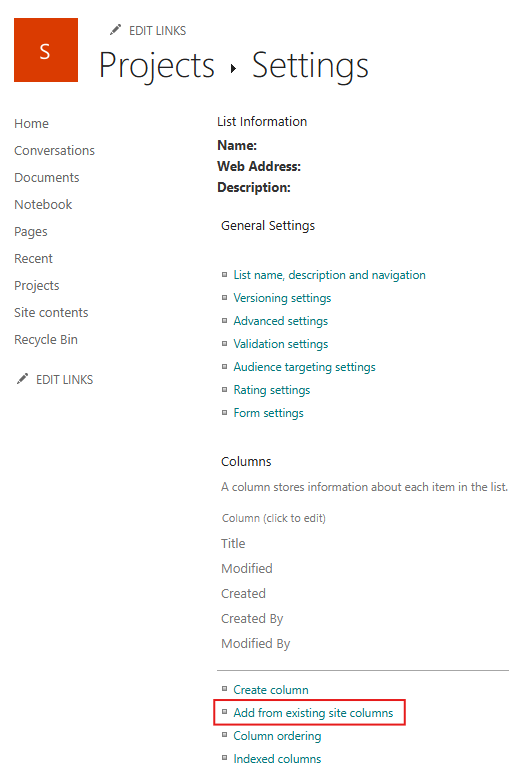
Select Add from existing site columns
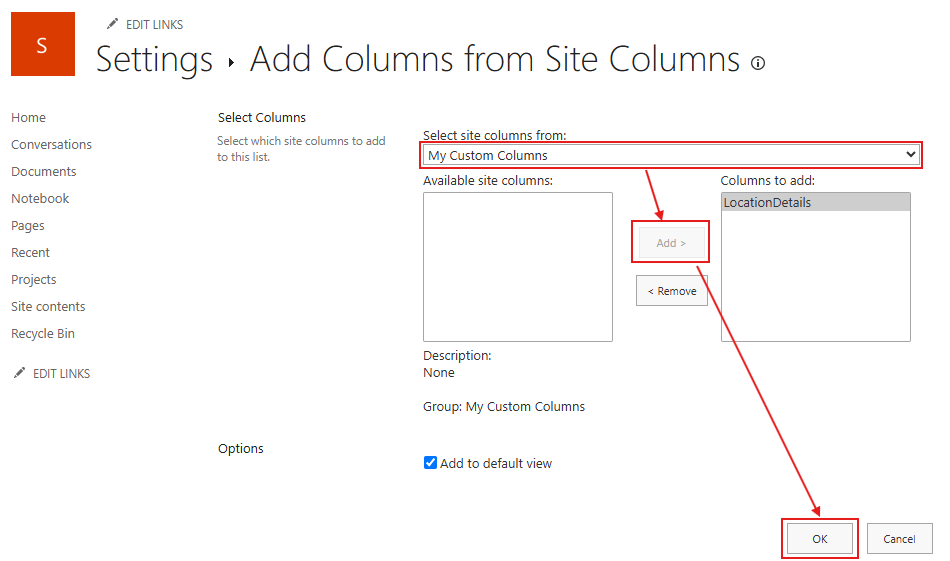
Select the group where the custom field is located (in my case, My Custom Columns), select the LocationDetails field, and click on the Add button, and then click OK.
Go to the newly created list and you will see the LocationDetails field added to the list. Add a new item and fill in the geolocation data. The field customizer will render the geolocation data as defined in the onRenderCell method.

Conclusion
In this guide, we've walked through the steps to deploy an SPFx geolocation field customizer to SharePoint Online. By following these steps, you can enhance your SharePoint lists with custom rendering for geolocation fields, providing a better user experience.