Why use Exchange Online RBAC for Applications?
In a previous article, I introduced Exchange Online Role Based Access Control (RBAC) for Applications and explained how it can restrict an application's access to specific Exchange Online resources.
In this article, I will use it to build a room-booking application with limited mailbox access.
Imagine that the application manages meeting rooms at one company location. Granting the Microsoft Graph Calendars.ReadWrite application permission through Microsoft Entra ID normally allows the application to access calendars in every mailbox across the organization. The application might need access to only tens of room mailboxes, while the permission covers thousands of user and resource mailboxes.
Exchange Online RBAC for Applications addresses this problem. It lets you assign an application role together with a resource scope, ensuring that the booking application can access only the room calendars it needs to manage.
Prerequisites and important notes
Before you begin, you need:
- A Microsoft Entra ID tenant with Exchange Online.
- Room mailboxes for the locations you want the application to manage.
- Permission to register an application in Microsoft Entra ID.
- An administrator or setup application authorized to manage Exchange Online RBAC configuration through Microsoft Graph. The least-privileged permission for the write operations in this article is
RoleManagement.ReadWrite.Exchange.
[!IMPORTANT] The Microsoft Graph endpoints used to create the Exchange Online application scope and role assignment are currently available only under /beta. Beta APIs are subject to change and aren't supported for production applications. The booking application's calendar calls use the Microsoft Graph v1.0 endpoint.
The identity used to configure RBAC is separate from the booking application. The booking application itself should not receive an organization-wide Calendars.ReadWrite permission in Microsoft Entra ID. Microsoft Entra permissions and Exchange Online RBAC assignments are additive; an existing tenant-wide permission would bypass the mailbox restriction created here.
Register the booking application
Sign in to the Microsoft Entra admin center, open App registrations, and select New registration. Enter a name for the booking application and keep it single-tenant by selecting Accounts in this organizational directory only.
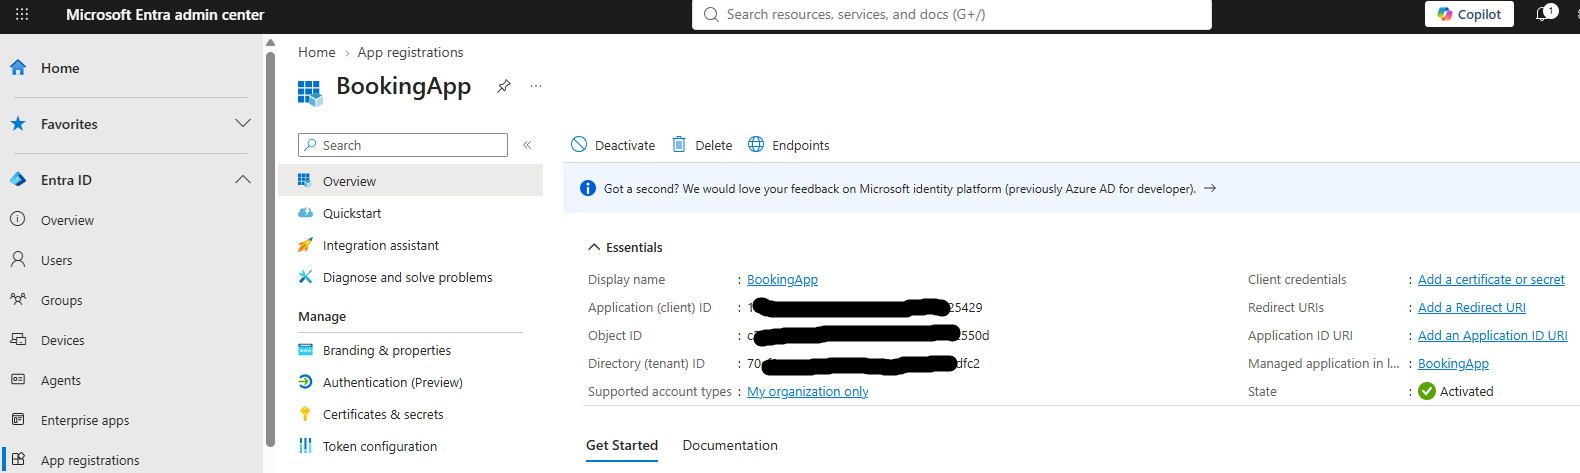
After registration, record the Application (client) ID and Directory (tenant) ID.
Under Manage, select Certificates & secrets, and create a client secret. Copy the secret value immediately because it won't be shown again.
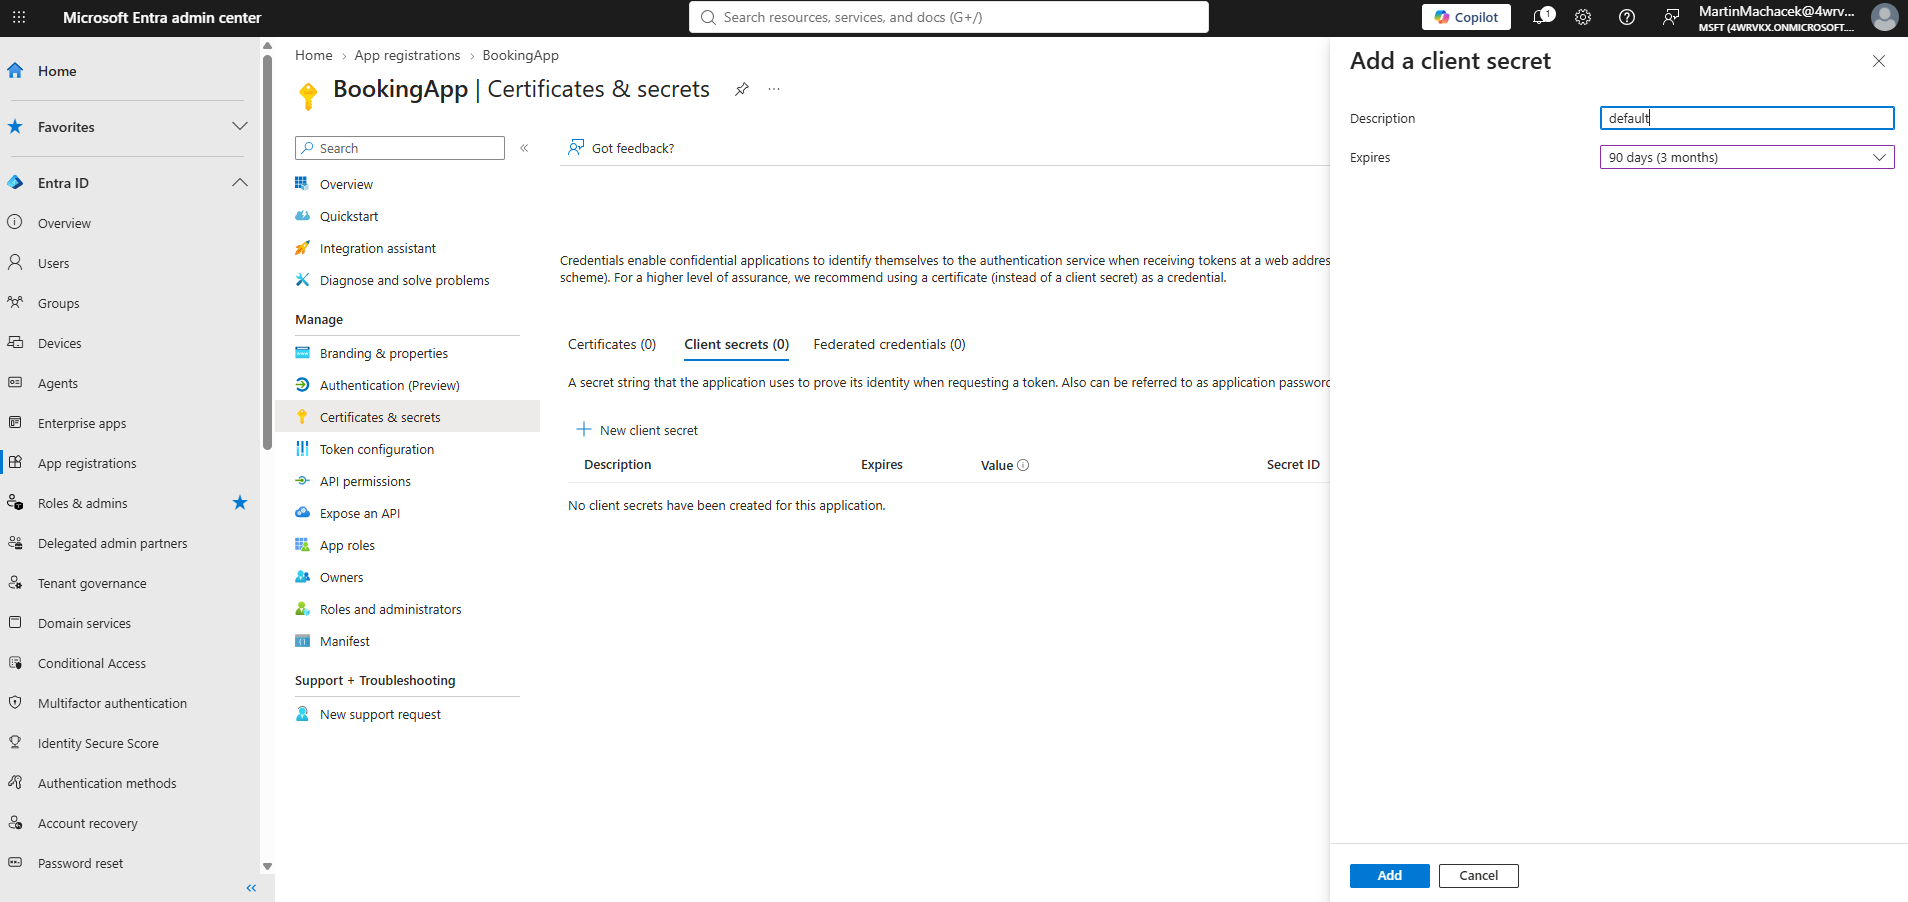
A client secret is convenient for this demonstration. For a production application, prefer a certificate or managed identity when the hosting platform supports it, and never store credentials directly in source code.
Do not grant the booking application an organization-wide Microsoft Graph application permission such as Calendars.ReadWrite. Access to the selected mailboxes will be granted through Exchange Online RBAC instead.
Configure the room mailbox attributes
This example identifies the target room mailboxes with two Exchange recipient properties:
CustomAttribute1is set toMeetingRoom.Officeis set toPrague.
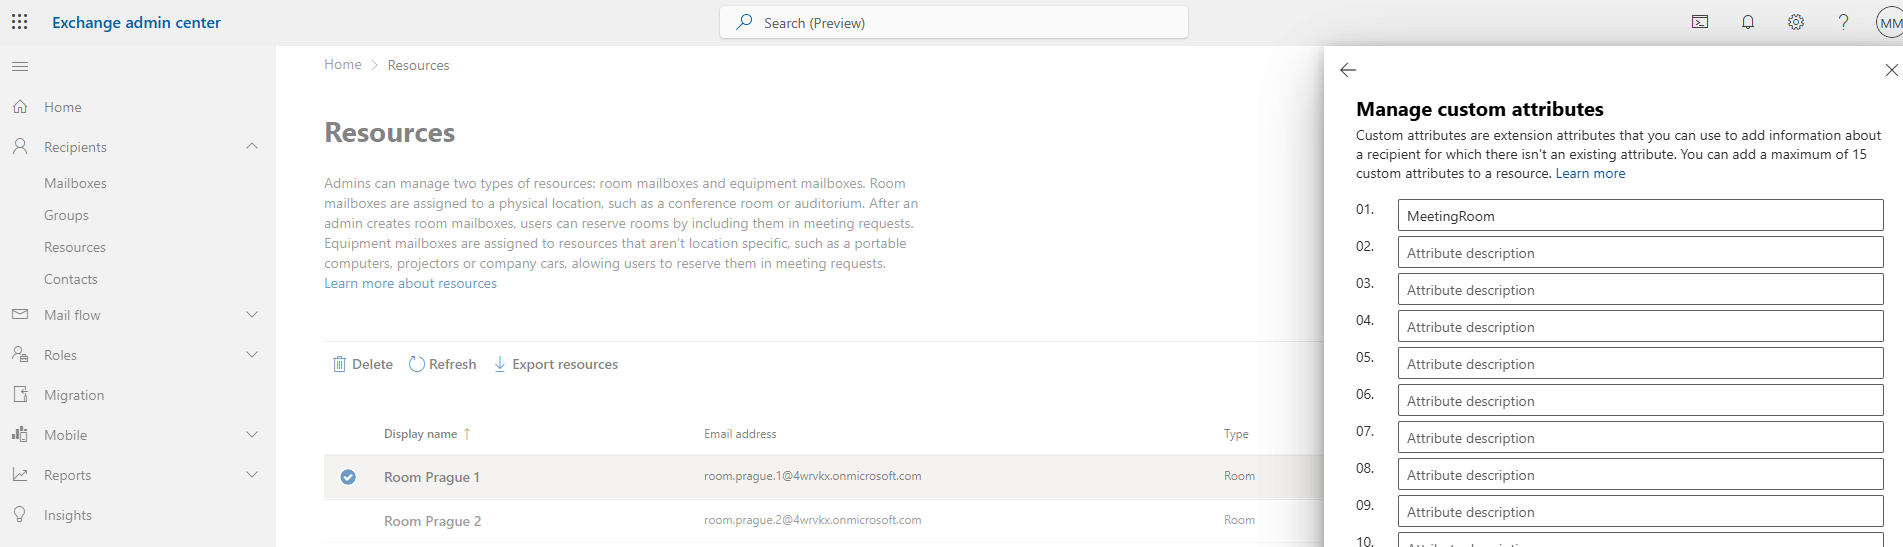
Choose attributes that match your organization's mailbox-management strategy. The properties in the recipient filter are Exchange recipient properties, not Microsoft Graph user properties.
Create the application scope
Use an administrator token with RoleManagement.ReadWrite.Exchange to create a custom application scope. The following scope includes only recipients where CustomAttribute1 equals MeetingRoom and Office equals Prague:
POST https://graph.microsoft.com/beta/roleManagement/exchange/customAppScopes
Content-Type: application/json

{
  "type": "RecipientScope",
  "displayName": "Prague meeting rooms",
  "customAttributes": {
    "Exclusive": false,
    "RecipientFilter": "CustomAttribute1 -eq 'MeetingRoom' -and Office -eq 'Prague'"
  }
}
A successful request returns 201 Created and includes the new scope's id. Save this value as {customAppScopeId} for the role assignment.
Find the service principal and role definition IDs
You need three values to create the role assignment:
- The custom application scope ID from the previous step.
- The booking application's service principal object ID.
- The ID of the
Application Calendars.ReadWriterole definition.
Get the service principal by replacing {applicationClientId} with the booking application's Application (client) ID:
GET https://graph.microsoft.com/v1.0/servicePrincipals(appId='{applicationClientId}')?$select=id,appId,displayName
Use the returned id as {servicePrincipalObjectId}. This is the service principal's object ID, not the application registration's object ID.
Next, retrieve the Exchange Online role definition:
GET https://graph.microsoft.com/beta/roleManagement/exchange/roleDefinitions?$filter=displayName eq 'Application+Calendars.ReadWrite'
Save the returned role definition id as {roleDefinitionId}.
Assign the scoped calendar role
Create a role assignment that connects the service principal, the calendar role, and the custom application scope:
POST https://graph.microsoft.com/beta/roleManagement/exchange/roleAssignments
Content-Type: application/json

{
  "principalId": "/ServicePrincipals/{servicePrincipalObjectId}",
  "roleDefinitionId": "{roleDefinitionId}",
  "appScopeId": "{customAppScopeId}"
}
A successful request returns 201 Created and the new role assignment:
{
  "@odata.context": "https://graph.microsoft.com/beta/$metadata#roleManagement/exchange/roleAssignments/$entity",
  "id": "{roleAssignmentId}",
  "principalId": "/ServicePrincipals/{servicePrincipalObjectId}",
  "roleDefinitionId": "{roleDefinitionId}",
  "directoryScopeId": null,
  "appScopeId": "{customAppScopeId}"
}
Test the booking application
The following .NET example uses the Microsoft.Graph and Azure.Identity NuGet packages.
static async Task Main(string[] args)
{
    var clientId = "{clientId}";
    var tenantId = "{tenantId}";
    var secret = "{clientSecret}";


    var credentials = new ClientSecretCredential(tenantId, clientId, secret);
    var client = new GraphServiceClient(credentials);

    var rooms = new[]
    {
        "room.prague.1@4wrvkx.onmicrosoft.com",
        "room.prague.2@4wrvkx.onmicrosoft.com",
        "room.berlin.1@4wrvkx.onmicrosoft.com"
    };

    foreach (var room in rooms)
    {
        Console.WriteLine($"Creating event for room: {room}");

        try
        {
            var startUtc = DateTime.UtcNow.AddHours(1);
            var endUtc = startUtc.AddHours(1);

            var newEvent = new Event
            {
                Subject = "SQA Meeting",
                Start = new DateTimeTimeZone
                {
                    DateTime = startUtc.ToString("o"),
                    TimeZone = "UTC"
                },
                End = new DateTimeTimeZone
                {
                    DateTime = endUtc.ToString("o"),
                    TimeZone = "UTC"
                }
            };

            var result = await client.Users[room].Events.PostAsync(newEvent);
            Console.WriteLine($"Event {newEvent.Subject} created successfully with ID: {result.Id}");

            var events = await client.Users[room].Events.GetAsync();
            Console.WriteLine($"Events for room: {room}");
            foreach (var ev in events.Value)
            {
                Console.WriteLine($"Event ID: {ev.Id}");
                Console.WriteLine($"Subject: {ev.Subject}");
                Console.WriteLine($"Start: {ev.Start.DateTime}, End: {ev.End.DateTime}");
                Console.WriteLine();
            }
        }
        catch (ApiException ex)
        {
            Console.WriteLine($"Response Status Code: {ex.ResponseStatusCode}, Message: {ex.Message}");
        }
        catch (Exception ex)
        {
            Console.WriteLine($"An error occurred: {ex.Message}");
        }
    }
}
The two Prague room mailboxes are accessible because their attributes match the custom application scope. The Berlin room is outside the scope, so Microsoft Graph returns 403 Forbidden when the application tries to access its calendar.
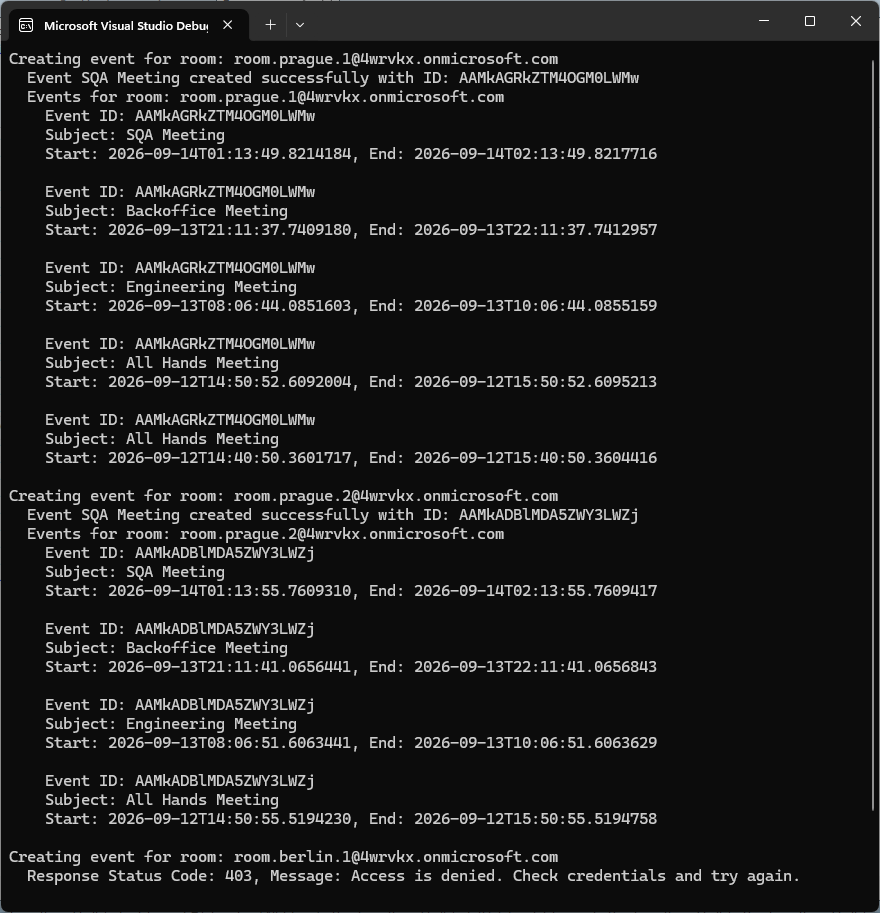
This example writes directly to room calendars to demonstrate the authorization boundary. Your complete booking solution should also check availability, handle conflicts, and implement the organization's room-booking workflow.
Conclusion
Exchange Online RBAC for Applications makes it possible to keep app-only calendar automation without granting tenant-wide mailbox access. In this example, the booking application receives Application Calendars.ReadWrite only for room mailboxes whose Exchange attributes identify them as Prague meeting rooms. The Prague operations succeed, while the same requests against the Berlin room are denied.
This design follows the principle of least privilege and scales better than maintaining a hard-coded mailbox list: newly created rooms can enter the scope simply by receiving the correct Exchange attributes. Before using the pattern in a production solution, replace the client secret with a stronger credential, validate recipient filters carefully, review existing Microsoft Entra permissions, and account for the beta status of the RBAC management APIs.