Service communications API
The service communications API provides
- service health overviews
- message center posts
pertaining to the Microsoft cloud services subscribed by your tenant
You can get current and historical health data of a Microsoft service.
Message center posts let you keep track of upcoming changes, including new features, updates, and other important announcements.
Endpoints for custom connector
I would like to implement all endpoints that are exposed by the Graph service communications API.
The table below shows all endpoints with required permission.
| Endpoint | Permissions | Description |
|---|---|---|
GET /admin/serviceAnnouncement/healthOverviews |
ServiceHealth.Read.All | Provides the health report of all subscribed services for a tenant |
GET /admin/serviceAnnouncement/healthOverviews/{ServiceName} |
ServiceHealth.Read.All | Provides the health information of a specified service for a tenant |
GET /admin/serviceAnnouncement/issues |
ServiceHealth.Read.All | Retrieves information about all service health issues that exist for the tenant |
GET /admin/serviceAnnouncement/issues/{issueId} |
ServiceHealth.Read.All | Retrieves a specified service health issue for tenant. The operation returns an error if the issue does not exist for the tenant |
GET /admin/serviceAnnouncement/issues/{issueId}/incidentReport |
ServiceHealth.Read.All | Provides the Post-Incident Review (PIR) document of a specified service issue for tenant |
GET /admin/serviceAnnouncement/messages |
ServiceMessage.Read.All | retrieves all service update messages that exist for the tenant |
GET /admin/serviceAnnouncement/messages/{messageId} |
ServiceMessage.Read.All | retrieves a specified service update message for the tenant. The operation returns an error if the message does not exist for the tenant |
GET /admin/serviceAnnouncement/messages/{messageId}/attachments |
ServiceMessage.Read.All | Get the list of attachments associated with a service message |
GET /admin/serviceAnnouncement/messages/{messageId}/attachments/{attId} |
ServiceMessage.Read.All | Read the properties and relationships of a serviceAnnouncementAttachment object. |
POST /admin/serviceAnnouncement/messages/markRead |
ServiceMessageViewpoint.Write | Mark a list of serviceUpdateMessages as read for the signed in user. |
POST /admin/serviceAnnouncement/messages/markUnread |
ServiceMessageViewpoint.Write | Mark a list of serviceUpdateMessages as unread for the signed in user. |
POST /admin/serviceAnnouncement/messages/archive |
ServiceMessageViewpoint.Write | Archive a list of serviceUpdateMessages for the signed in user. |
POST /admin/serviceAnnouncement/messages/unarchive |
ServiceMessageViewpoint.Write | Unarchive a list of serviceUpdateMessages for the signed in user. |
POST /admin/serviceAnnouncement/messages/favorite |
ServiceMessageViewpoint.Write | Change the status of a list of serviceUpdateMessages to favorite for the signed in user. |
POST /admin/serviceAnnouncement/messages/unfavorite |
ServiceMessageViewpoint.Write | Remove the favorite status of serviceUpdateMessages for the signed in user. |
Create Entra application
Before we start creating a custom connector, flows, and triggers, we need to register a new application in the Microsoft Entra admin center.
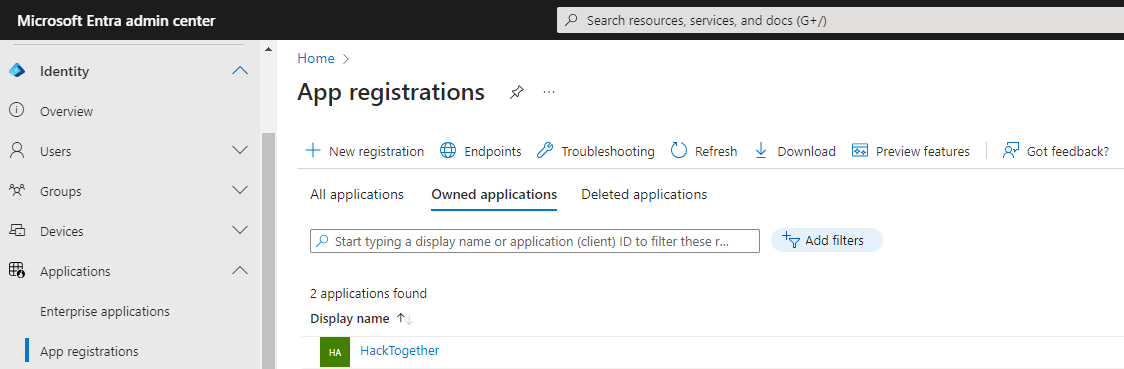
Step 1
Login to the Entra admin center, Go to Applications → App registrations and click on New registration.
Step 2
Choose the name of the application, select that accounts from any tenant can use this app. For Redirect URL choose Web, and set the URL to https://global.consent.azure-apim.net/redirect
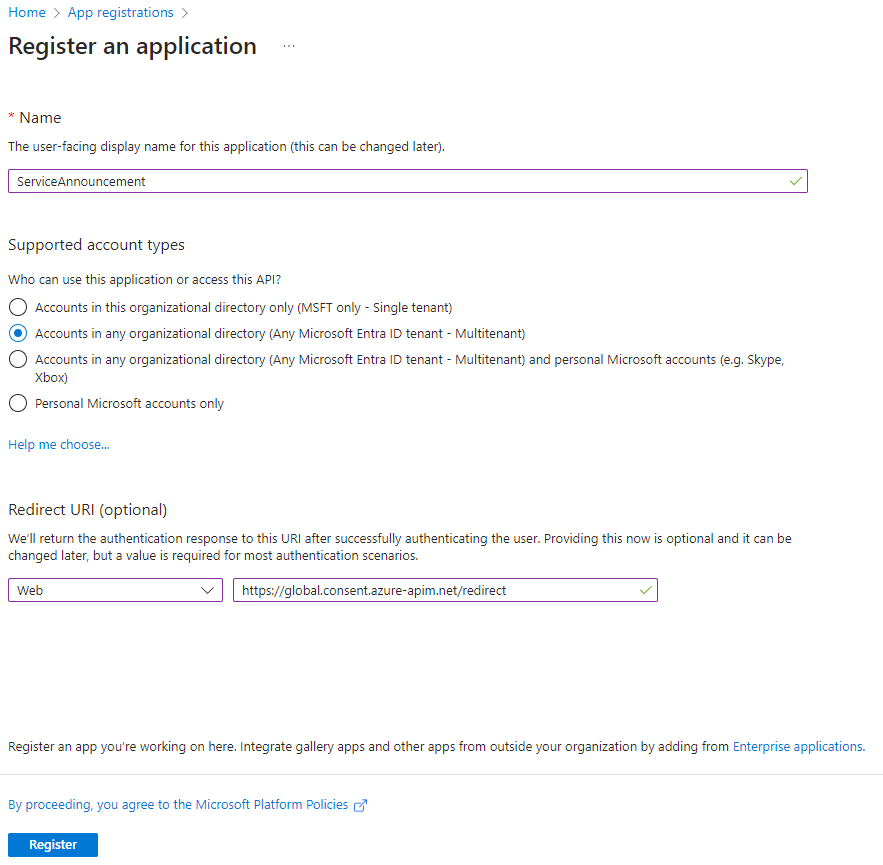
Click on the Register button.
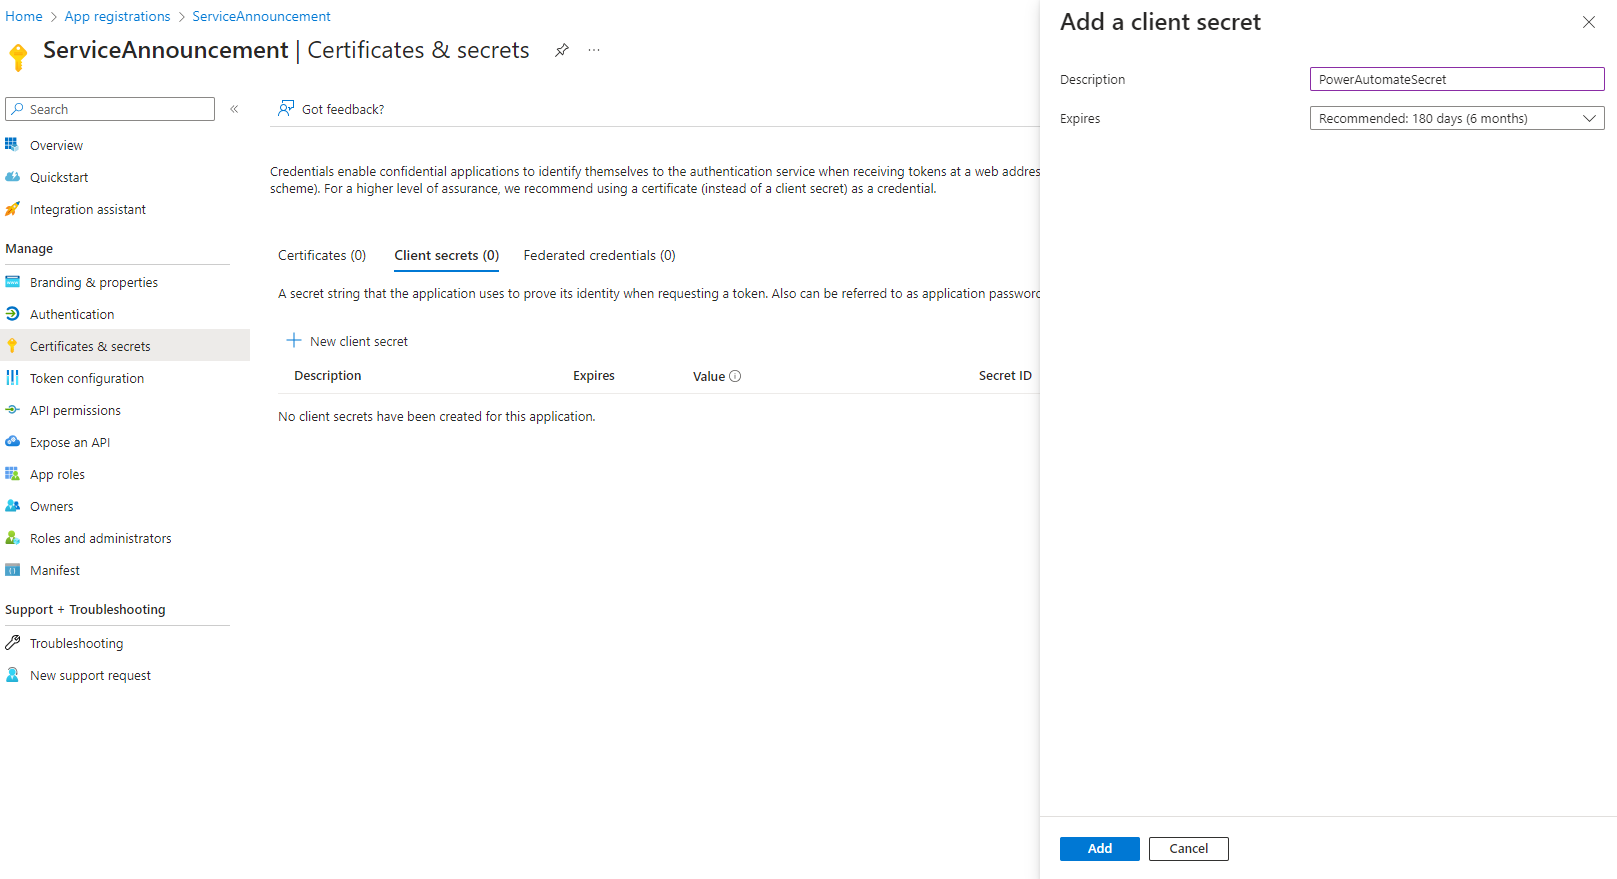
Step 3
Go to Certificates & secrets, select the Client secrets tab, and add a new client secret. We will use the client secret later when creating a custom connector in the Power Automate.
Step 4
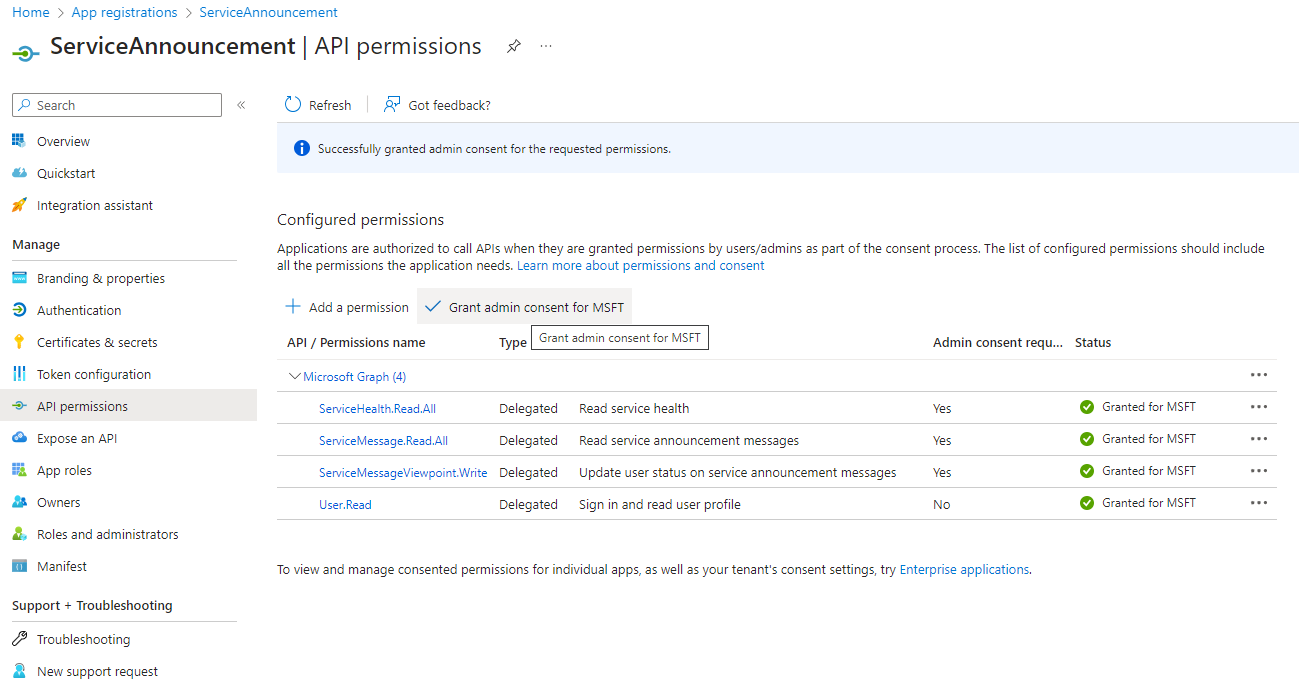
Go to API permissions and add the delegated permissions for the Graph API: ServiceHealth.Read.All, ServiceMessage.Read.All and ServiceMessageViewpoint.Write.
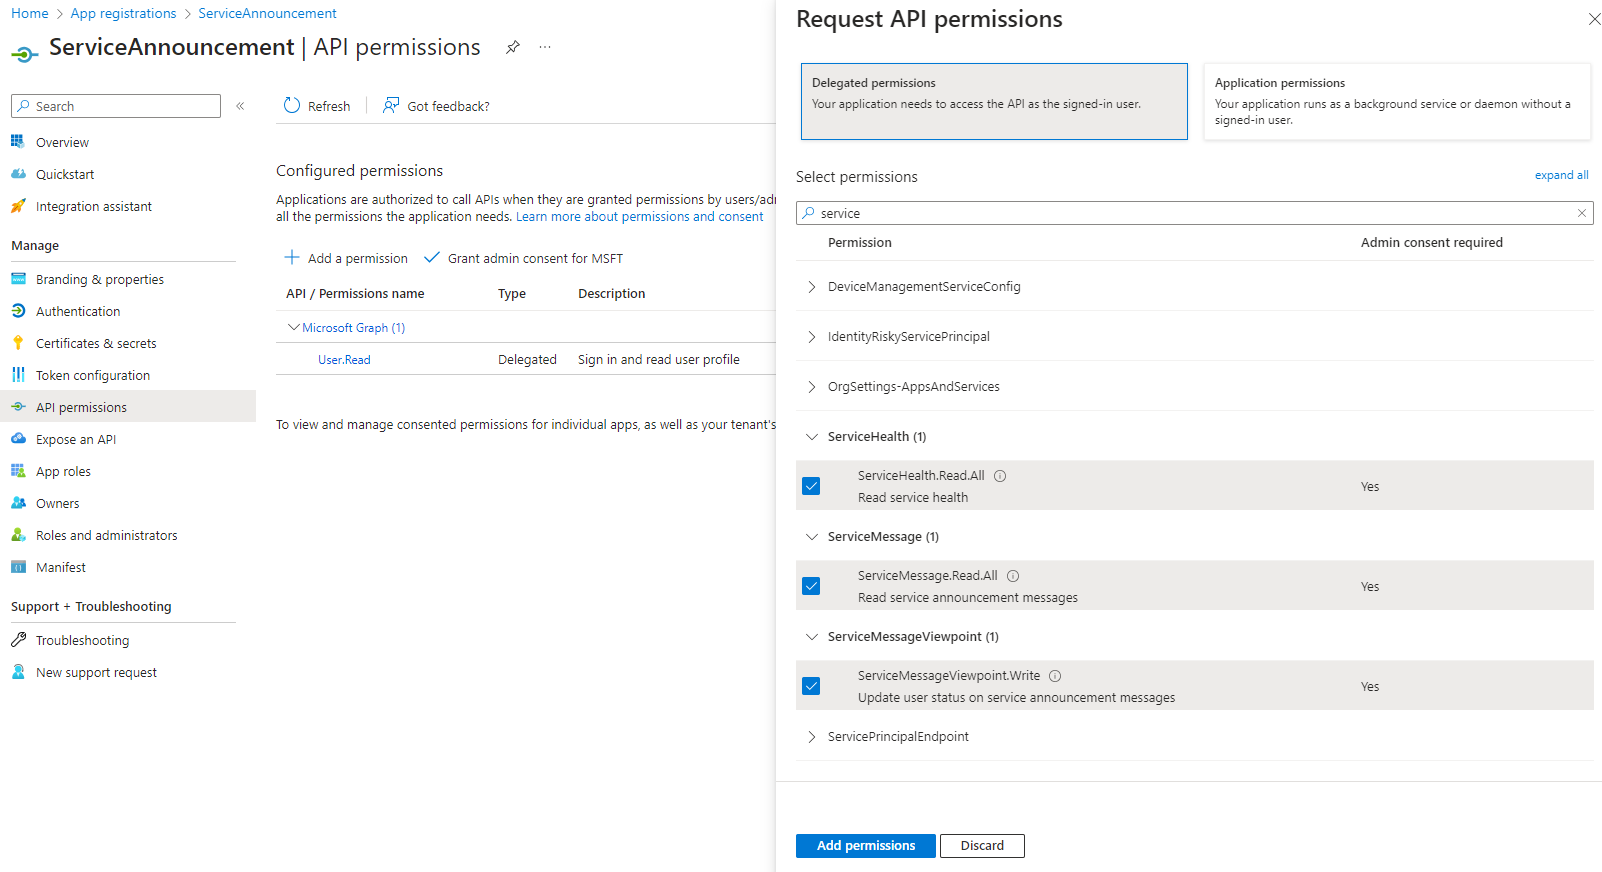
Step 5
Grant admin consent
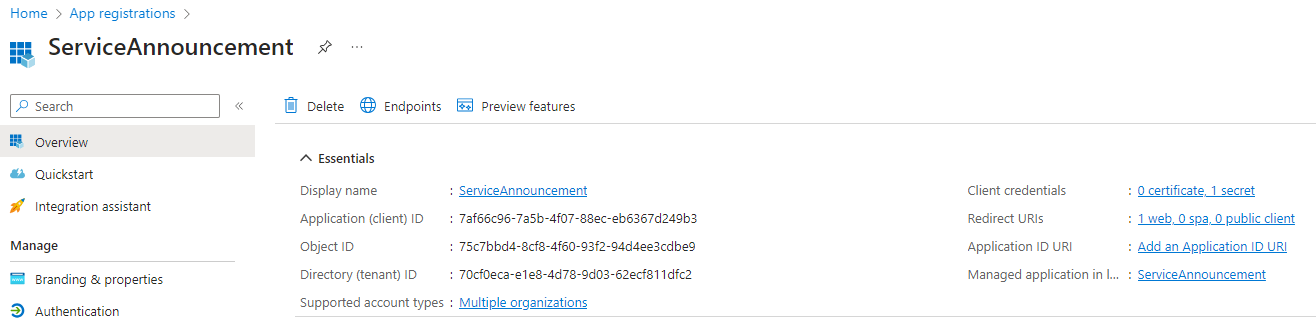
Step 6
Save the tenant id and the client id.
That was easy and quick.
Create custom connector in Power Automate
Time to create a custom connector. I will create the connector in different tenant to demonstrate that it's possible.
Login to the Power Automate
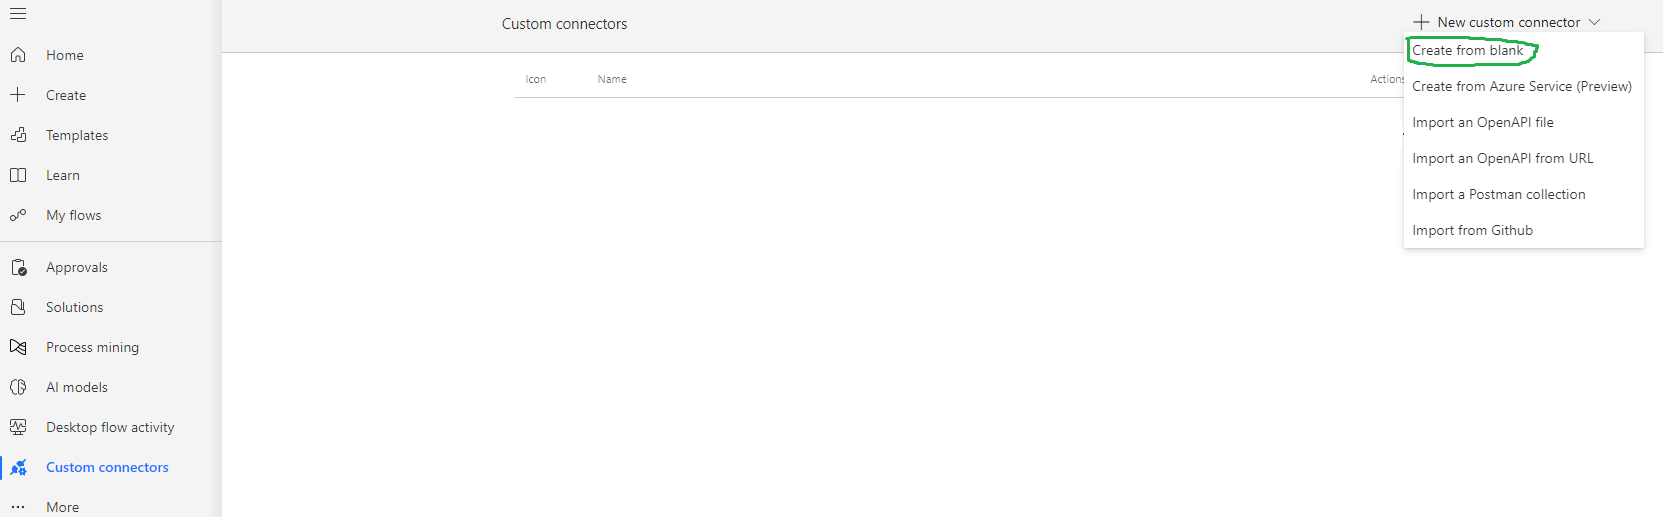
Step 1
Click on Custom connectors → New custom connector → Create from blank
Step 2
Set the connector name to ServiceAnnouncement and click on the Continue button.

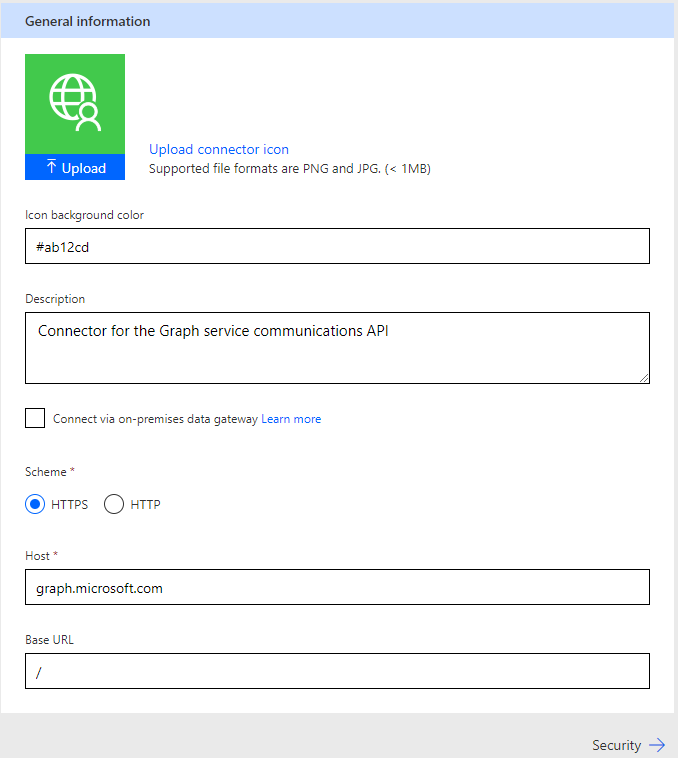
Step 3
On the General tab, fill the description, set the scheme to HTTPS and set the host to graph.microsoft.com.
Step 4
Click on the Security tab, choose the OAuth 2.0 authentication type. Choose the Azure Active Directory identity provider.
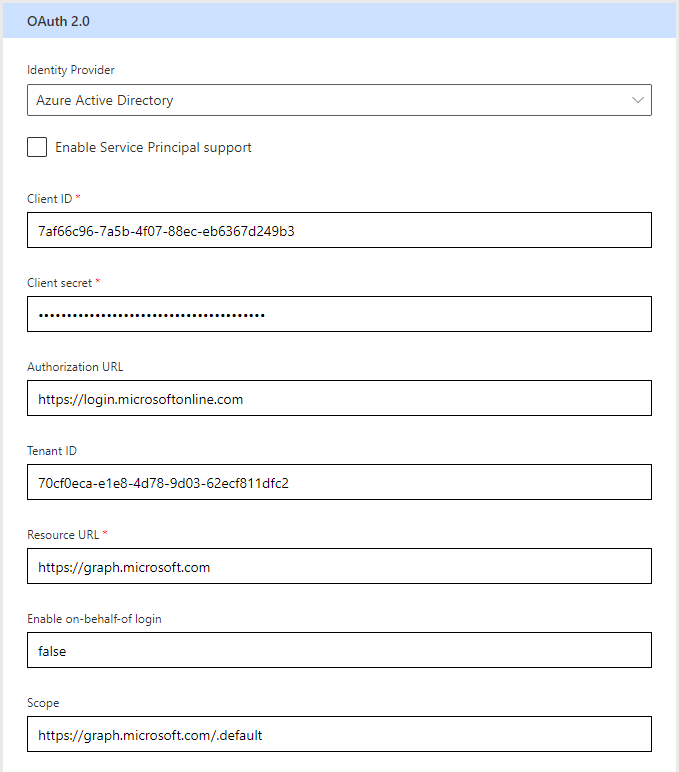
Fill the client id, and the client secret. For the tenant id, use the specific id of your tenant instead of the default value common. Set the resource URL to https://graph.microsoft.com
Step 5
Click on the Definition tab and create a new action to be able to test the connector.

Click on Import from sample and import
- Verb:
GET - URL:
https://graph.microsoft/v1.0/admin/serviceAnnouncement/healthOverviews?$filter=xxx
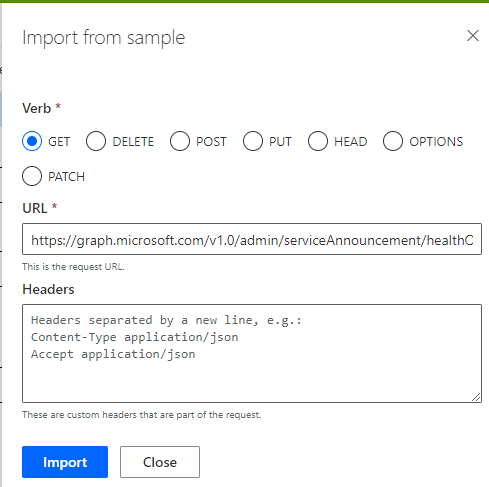
I've specified the $filter query parameter in the URL. It will allow us to specify a filter when creating new flow.
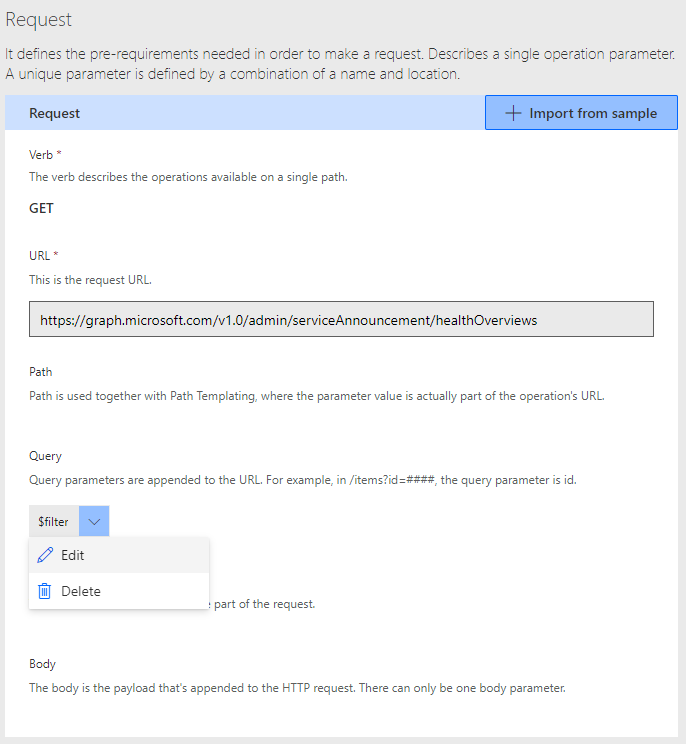
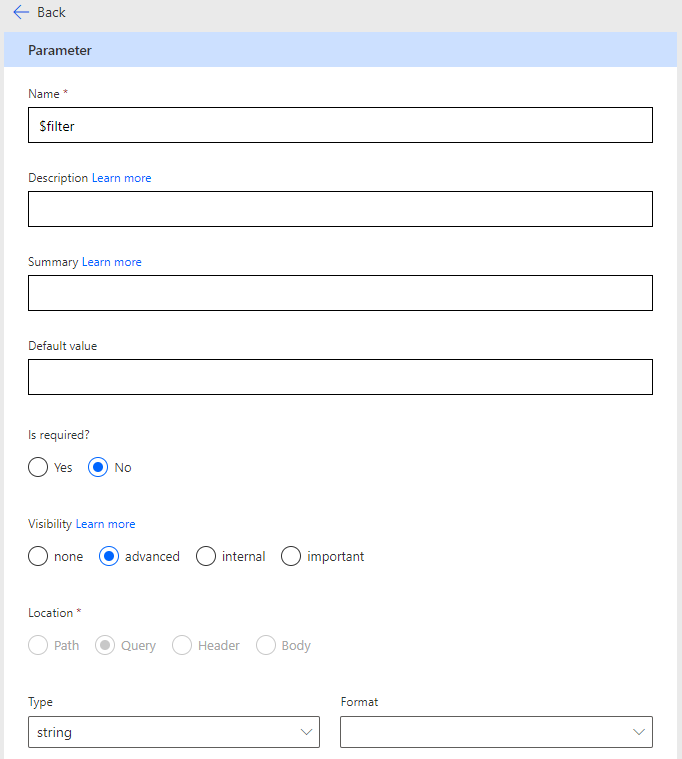
Edit the $filter query parameter and set the visibility to advanced.
Step 6
Under the Response click on Add default response
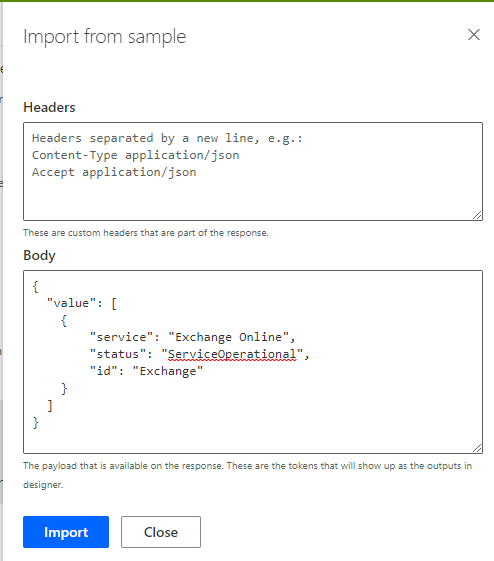
and insert the following payload to the Body
{
  "value": [
    {
        "service": "Exchange Online",
        "status": "ServiceOperational",
        "id": "Exchange"
    }
  ]
}
Step 7
Click on Create a connector to save the connector.
Step 8
Time to test the connector. On the Test tab, create a new connection.
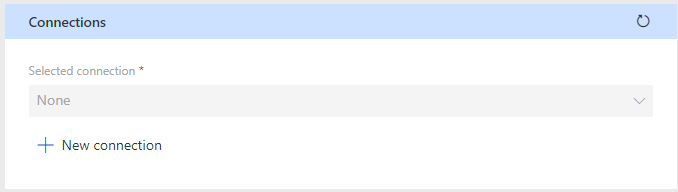
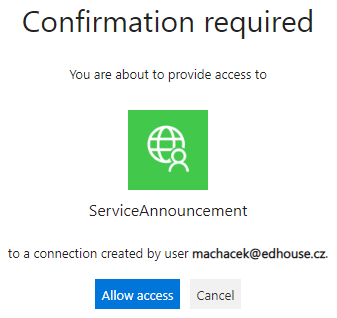
Select your account and confirm the access.
Step 9
Test the Get-health-overviews operation

You should be able to see the response
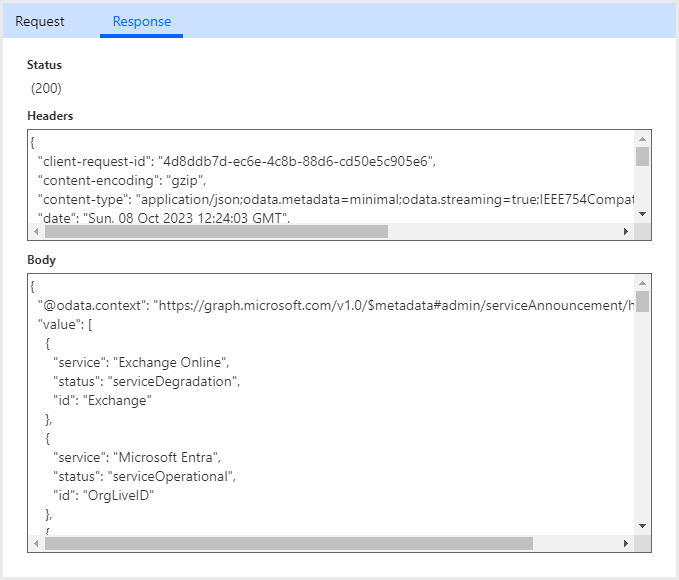
The connector is ready to use in the flow.
Create a flow
Let's create a new flow that will use the Get-health-overviews operation.
GET /v1.0/admin/serviceAnnouncement/healthOverviews returns the status of the operation in the response. I would like to receive an email on a daily basis with information on which services have different status than serviceOperational.
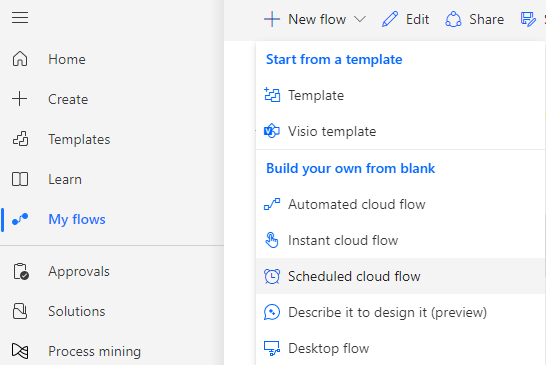
Step 1
Create a new scheduled cloud flow
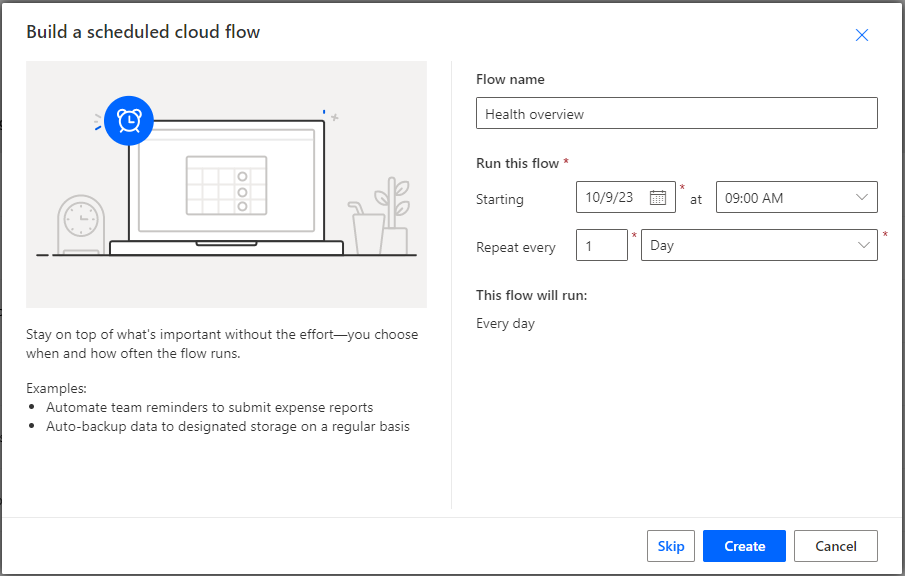
Step 2
Flow will run every day
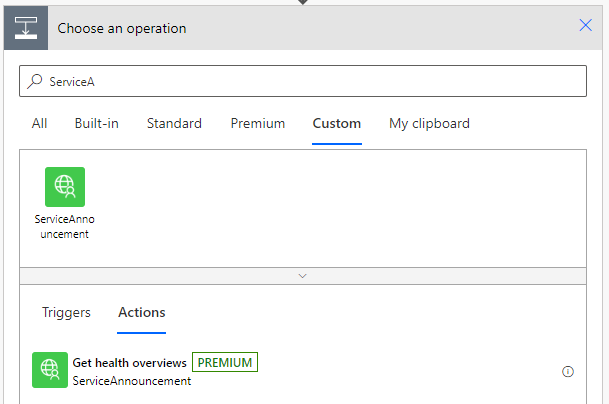
Step 3
Select the Custom tab and add the Get health overviews action.
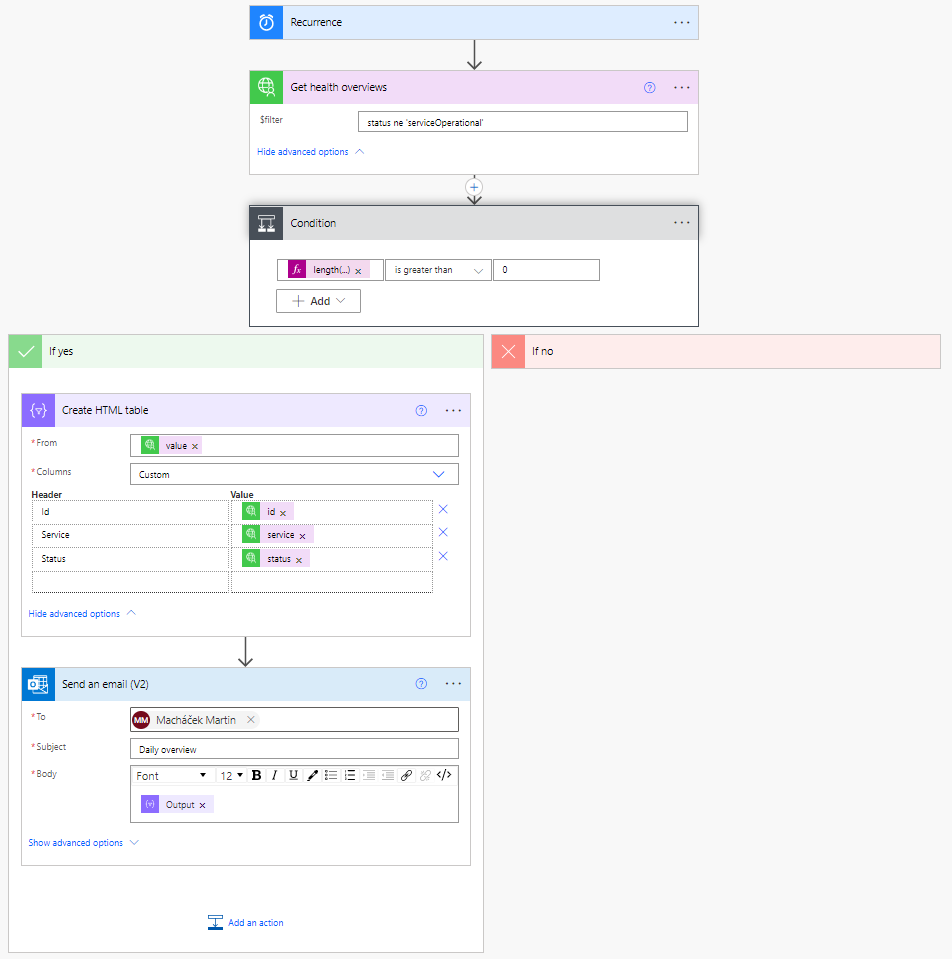
Step 4
Click on the Show advanced options menu and add the filter status ne 'serviceOperational'.
Step 5
Add a new condition. We want to send an email only if the status of some service is not equal to serviceOperational.
Define the condition:
- value (expression): length(outputs('Get_health_overviews')?['body/value'])
- condition: is greater than
- value: 0
Step 6
Add Create HTML table action, set value to From and define custom columns Id, Service and Status.
Step 7
Add Send an email (V2) to send the output of the previous action to your email.
The flow should look like this
Step 8
Save the flow.
Later you will receive an email with the overview.

Conclusion
I've demonstrated how to create a new multitenant custom connector, how to define a new operation and test the connector.
In the next few blogs, I will show you how to create the rest of the operations for the Graph service communication API.